Overview
This section guides you on how to enable Azure AD single sign-on in the Azure portal and configure single sign-on in your Jive application. To configure Azure AD single sign-on with Jive, perform the steps mentioned in the Process section below.
Process
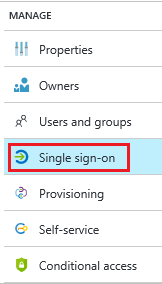
- In the Azure portal, on the Jive application integration page, click Single sign-on.
- On the Single sign-on dialog, select Mode as SAML-based Sign-on to enable single sign-on.
-
On the Jive Domain and URLs section, perform the following steps:
- In the Sign-on URL textbox, type a URL using the following pattern:
https://<instance name>.jivecustom.com
- In the Identifier textbox, type a URL using the following pattern:
https://<instance name>.jiveon.com
NOTE: These values are not real. Update these values with the actual Sign on URL and Identifier. Contact Jive Client support team to get these values.
- In the Sign-on URL textbox, type a URL using the following pattern:
- On the SAML Signing Certificate section, click Metadata XML and then save the XML file on your computer.
- Click the Save button.
- To configure single sign-on on the Jive side, sign-on to your Jive tenant as an administrator.
-
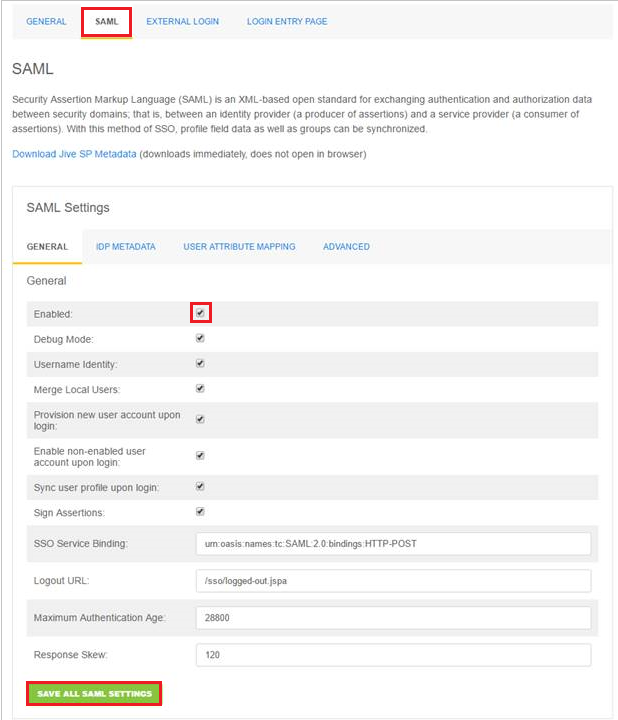
In the menu on the top, click SAML.
- Select Enabled under the GENERAL tab
- Click the SAVE ALL SAML SETTINGS button.
-
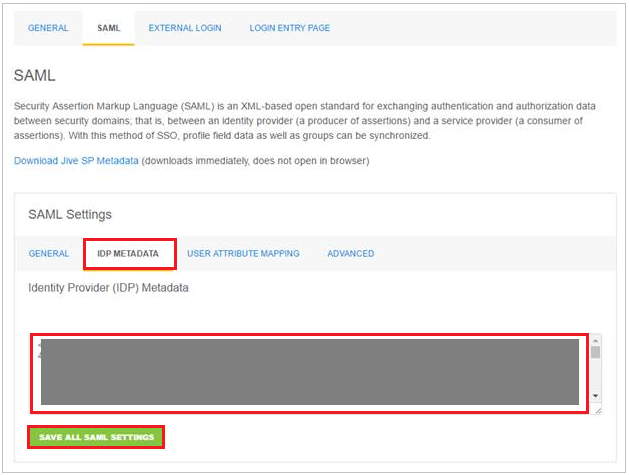
Navigate to the IDP METADATA tab.
- Copy the content of the downloaded metadata XML file, and then paste it into the Identity Provider (IDP) Metadata textbox.
- Click the SAVE ALL SAML SETTINGS button.
-
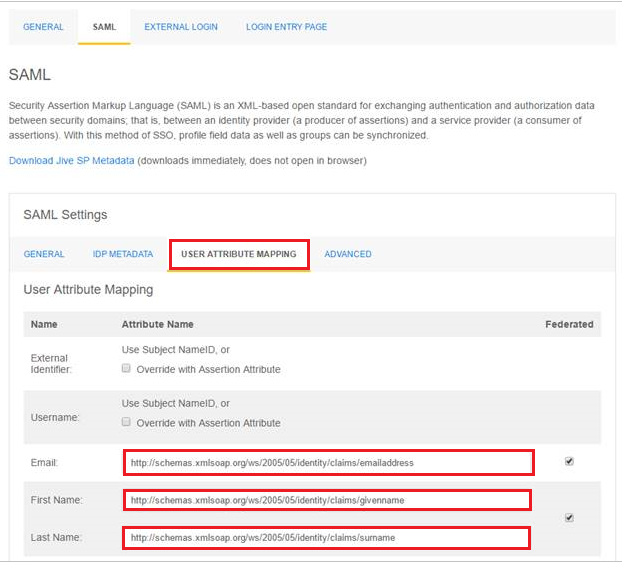
Go to the USER ATTRIBUTE MAPPING tab.
- In the Email textbox, copy and paste the attribute name of mail value.
- In the First Name textbox, copy and paste the attribute name of given name value.
- In the Last Name textbox, copy and paste the attribute name of surname value.
Related Articles
Integrating Jive with Microsoft Azure AD


Priyanka Bhotika
Comments