Overview
The Auto-Follow Extension is a Jive Professional Services plugin that allows a community manager to set up a series of rules that will force-follow a user to any number of different People, Places, or Blogs.
This article provides step-by-step instructions on how to create Auto-Follow rules.
Also, see Auto-Follow Extension User Guide for more information on how to view, delete, and configure the Auto-Follow extension.
Process
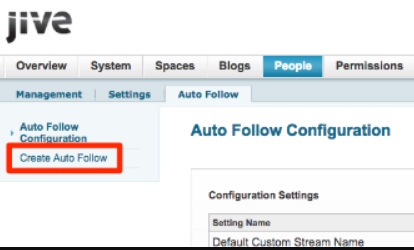
- Click Create Auto Follow from the Admin Console > People > Auto Follow screen.
- Choose which users should follow the Place, Blog, or User.
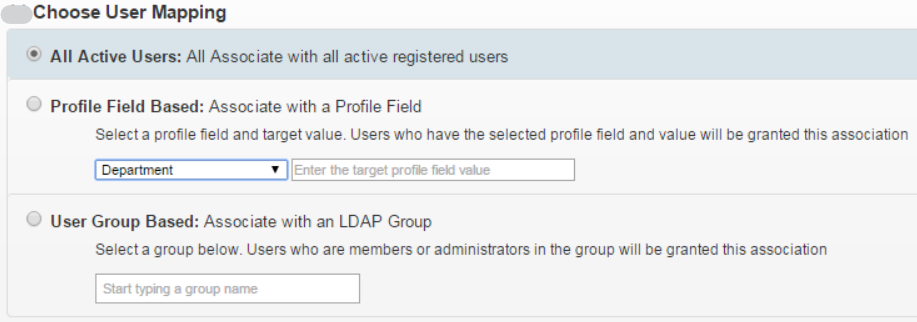
- Choosing User Mapping means you are selecting which users will receive the Auto-Follow. You can select users through one of the following three methods:
- All Active User: This means the Auto-Follow rule will be applied for all active registered users in the community.
- Profile Field Based: The drop-down populates with the profile fields configured in Jive. Be sure to enter the value exactly as it would appear in the users' profiles.
- User Group Based: You can select a group that is synced through LDAP or SAML (the group simply needs to be federated to use this option). Start typing the group name, and it will appear.
- Choosing User Mapping means you are selecting which users will receive the Auto-Follow. You can select users through one of the following three methods:
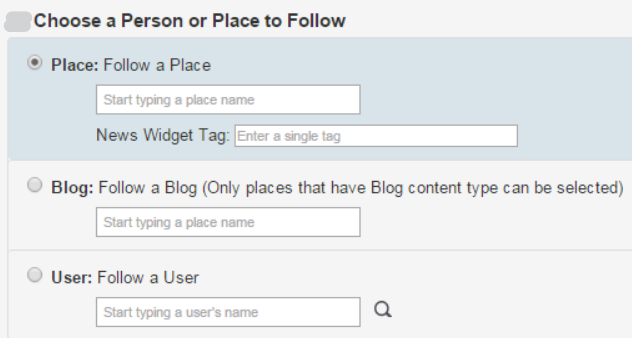
- Choose whether the users should follow a Place, Blog, or User:
- If you would like the users to follow a Place, you can select a Space or Group.
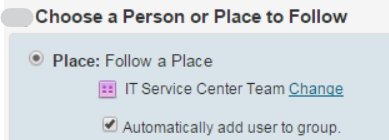
- If you select a Space, be sure not to select the radio button to add users to the group automatically. If you do, the Auto-Follow rule will not be created.
- This functionality is reserved for Groups, which can have Members vs. Spaces, which are access-based and do not share this same functionality.
- It should look like this for a Space:
- It should look like this for a Group (if you want to add users to the selected Group):
- Please see the article: Configuring the News Widget Tag to see more details.
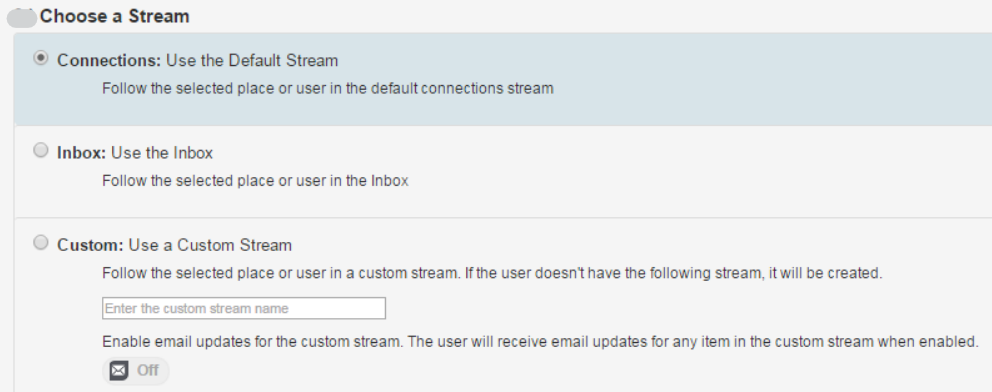
- Select the method by which you want the user to receive the content:
- You can either choose the out-of-the-box Default Connection Stream (Connections), the user's Inbox (Inbox), or a Custom Stream (Custom).
- You can have multiple rules feed into the same stream.
- You can also choose whether you want the user to receive email notifications when there are updates within the Custom Stream you create.
- Be sure to remember that a user can only have ten Custom Streams.
Related Article
See Jive Auto-Follow Extension to understand what happens if a user already has 10 custom streams.

Priyanka Bhotika
Comments